
Rideau Valley Leaf-Fall: Exterior Vent/Intake Clearing Guide for Ottawa Homes

Late fall in Ottawa brings cool rain, gusty days along the Rideau and piles of wet leaves. Those leaves do not just sit on the lawn; they get blown into corners, against fences and right over side-wall PVC vents. High-efficiency furnaces are sensitive to that kind of blockage. Even a partially covered intake or exhaust can cause the furnace to trip a safety. Doing one exterior vent pass in October or early November is an easy way to keep the furnace running steadily as we head toward freezing nights.
Where Ottawa Homes Hide Their Vents
Every house is a little different, so start with a quick vent map.
1. Side-wall PVC vents
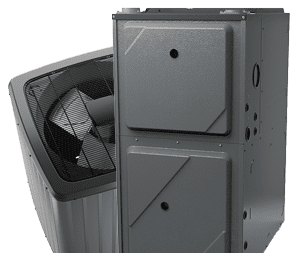
These are the most common on high-efficiency furnaces and gas water heaters in Ottawa. You will see one or two short PVC pipes coming through a side wall, usually at about knee-to-chest height. This is the first place leaves and seeds will collect.
2. Rear or driveway wall vents
Homes in Barrhaven, Kanata, Stittsville and newer Orleans builds often put vents on the driveway or backyard side. These walls get swirling leaves from raking and plowing, so check them too.
3. Higher or roof-adjacent vents
Some equipment vents higher, near a soffit or above a deck. You do not need to climb to check these. Look from the ground to make sure the factory screen is still on and not covered in debris. If you cannot see it clearly, have Anchor check it during your visit.
4. Shared vent walls
If your furnace, HRV/ERV, and water heater all vent to the same wall, debris in one spot usually indicates it’s at the other terminations as well.
This mapping step is homeowner-safe. You are only locating and visually checking, not taking anything apart.
Ottawa Leaf-Fall Hazards for Furnace Vents
Ottawa’s fall debris has a few problem types.
- Wet leaves sit and mat over the vent, which is almost like putting a lid on the intake.
- Helicopter seeds and small twigs lodge in screens and louvres, slowly reducing airflow.
- Nest material can show up in quiet, sheltered vent areas once temperatures drop.
- Tight side yards and fence lines trap leaves exactly where the vent needs to breathe.
Natural Resources Canada advises homeowners to keep combustion appliances and venting in good condition and to ensure outdoor exhaust/air intakes are not blocked by snow, debris, or vegetation.
Health Canada also warns that blocked or poorly vented fuel-burning equipment can increase the risk of carbon monoxide in the home, so problems should be fixed right away. Both points apply directly in Ottawa during leaf-fall.
One-Evening Leaf-Clearing Checklist (Homeowner-Safe)
You can do this in about 20–30 minutes on a dry evening.
Step 1: Stay on the ground.
Do not climb to roof-level vents or upper decks to work around gas or combustion terminations. If a vent is hard to reach, add it to the Anchor list.
Step 2: Power off outdoor equipment if it is beside the vent.
If the vent is close to a heat pump or A/C condenser, make sure the outdoor unit will not start while you are working there.
Step 3: Brush, do not stuff.
Use a gloved hand or soft brush to remove leaves, seeds and webs from the vent opening. Do not stuff mesh, fabric or extra screen material into the vent to “keep it clean.” That can restrict combustion air. This follows Canadian safety guidance that outdoor exhaust and combustion-air pipes must be kept free of snow, leaves and other obstructions so appliances can vent properly.
Step 4: Clear a practical buffer about 24–36 inches around the vent so windblown leaves don’t get pulled back over the opening.
Move rakes, leaf bags, garden items and storage bins away from the vent area. If the space is clear, wind can move debris past the termination instead of holding it there.
Step 5: Check screens and louvres.
If the vent has a factory screen, make sure it is intact and not half blocked. Do not remove or modify it unless an Anchor technician tells you to, because vent terminations are part of the appliance’s approved venting and help prevent pests and combustion-air problems.
Step 6: Look at slope and drainage.
Where the PVC comes out of the wall, make sure it is not sagging and that wet leaves are not holding water against the outlet. If you see pooling or a sag, tell the technician.
That is all a homeowner needs to do. Do not take apart the venting, do not try to re-slant the pipe and do not run long brushes inside the vent.
When to Call Anchor Home Comfort (Pro-Only Work)
Call Anchor if any of these are true:
- The vent is very low and always under a pile of leaves
- The factory screen is missing or damaged
- The PVC is sloping the wrong way or looks loose
- Your furnace shows repeat codes after windy or rainy fall days
- You are not sure which vent belongs to which appliance
An Anchor Home Comfort technician can:
- Check vent heights and clearances against the furnace/water-heater manufacturer’s installation manual first, and confirm they align with Canadian combustion-air/venting guidance.
- Clean or replace damaged screens and hoods
- Confirm proper separation between intake and exhaust so exhaust is not pulled back in
- Inspect the furnace, HRV and water-heater venting at the same time
- Document vent locations so they are rechecked during Maintenance Plan tune-ups
This keeps the work inside Ontario’s safety requirements and avoids homeowners opening sealed combustion areas.
Tie It to a Pre-Winter Maintenance or Maintenance Plan Visit
Leaf-fall is a good reminder to have the furnace itself checked. When you book Anchor’s pre-winter safety or maintenance visit, tell them you already cleared the exterior terminations.
They can then:
- Inspect the furnace, blower and condensate side
- Check intake and exhaust pressures to confirm that fall debris is not restricting air
- Test CO alarms and tell you if they need to be replaced
- Add your vent map to your file so every Maintenance Plan visit looks at the exact locations
Test CO alarms monthly and follow Ontario requirements and the manufacturer’s replacement schedule, especially if vents were blocked or covered in debris.